A custom collection is a grouping of products created by a retailer to make their store more navigable. The merchant develops a custom collection and then chooses which products will be included.
Like the smart collection, a custom collection is useful for each business. It helps customers have better experience shopping. With that benefit, today, Beehexa will show you how to create a custom collection using Postman.
Now, let’s explore this subject a little deeper.
If this is the first time you make a call in the Postman, you must generate API credentials from the Shopify admin.
Step 1: Generate API Credentials From Shopify Admin
Follow the process of How to build a custom app for Shopify in 2022? To know how to access Shopify API.
-
- After creating an app, remember the Admin API access token and the API key to create a custom collection in Postman.
Step 2: Create A Custom Collection Using Postman
Now, we are ready to create a custom collection using Postman.
-
- Log in to your Postman and create a new workspace
-
- Then, create a new POST with this URL:
https://{API_key}:{admin_API_access_token}@{shop}.myshopify.com/admin/api/{api-version}/{resource}- {API_key} – The API key that you generated.
- {admin_API_access_token} – The admin API access token that you generated.
- {shop} – The name of your development store.
- {api-version} – The supported API version that you want to use.
- {resource} – A resource endpoint from the REST Admin API.
Or you can copy this example, remember to change {resource} to {custom_collections}:
https://ed86d512a2c95387ffa25f67074a222b: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@hexasync.myshopify.com/admin/api/2021-10/custom_collections.json

In the body section, click RAW and choose JSON.
Then enter this code.
Payload:
{
    "custom_collection": {
        "title": "T-shirt"
    }
}

Then clicks on send
Response: The API will return the data like this.
{
    "custom_collection": {
        "id": 263373226047,
        "handle": "t-shirt",
        "title": "T-shirt",
        "updated_at": "2022-03-31T13:10:53+09:00",
        "body_html": null,
        "published_at": "2022-03-31T13:10:53+09:00",
        "sort_order": "best-selling",
        "template_suffix": null,
        "published_scope": "web",
        "admin_graphql_api_id": "gid://shopify/Collection/263373226047"
    }
}

Step 3: Add And Remove Products From The Custom Collection
After creating a custom collection, you need to add products that you want to appear in this collection. Unlike the smart collection, you can add or remove easily in this collection.
To add products to this collection, follow the steps below:
-
- In the Shopify admin, choose products
-
- Click on collections
-
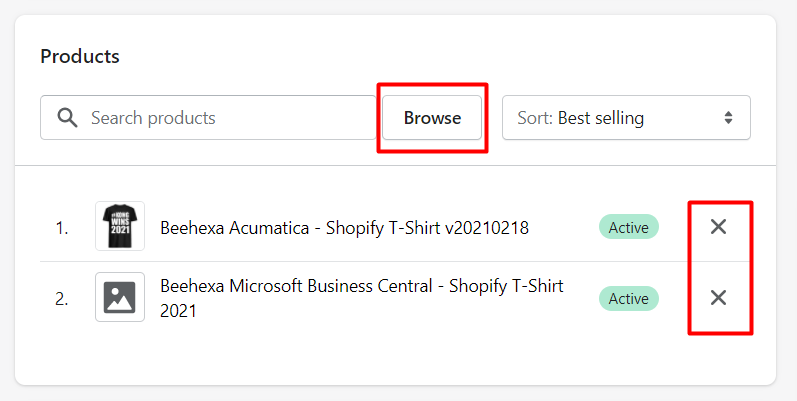
- Then choose the T-shirt collection and scroll down to the products area
-
- Click on the “Browse” button and search for the product that you want to add to the collection
-
- Finally, click on the “Add” button.
To delete a product, you press the X after the product name

Step 4: Verify The Result
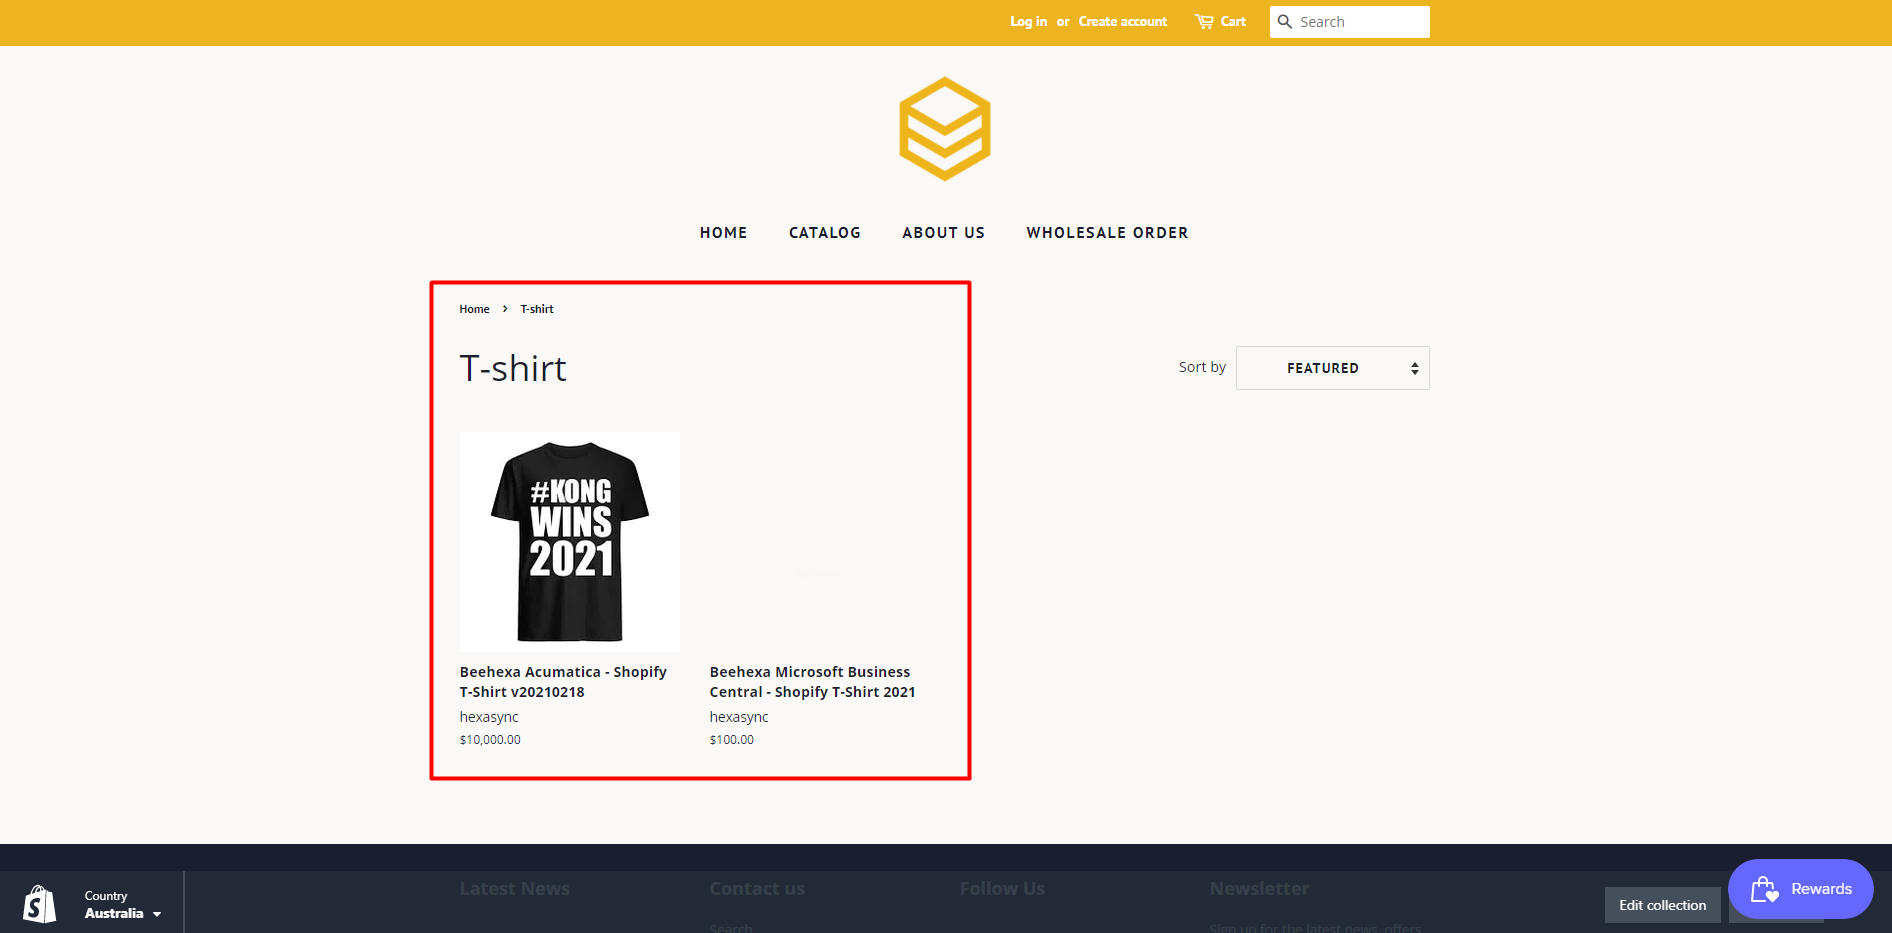
Now, let’s check the result in the Shopify store.
-
- In the custom collection, click on view. You can see the custom collection in the Shopify Store.

The above steps are to create a custom collection using Postman with Shopify API. Please comment below or refer to our Shopify API documentation if you have any questions.
The above steps will be shown visually in the video below.
Hopefully, you can do it!