Step 1: Add the Zalo OA App
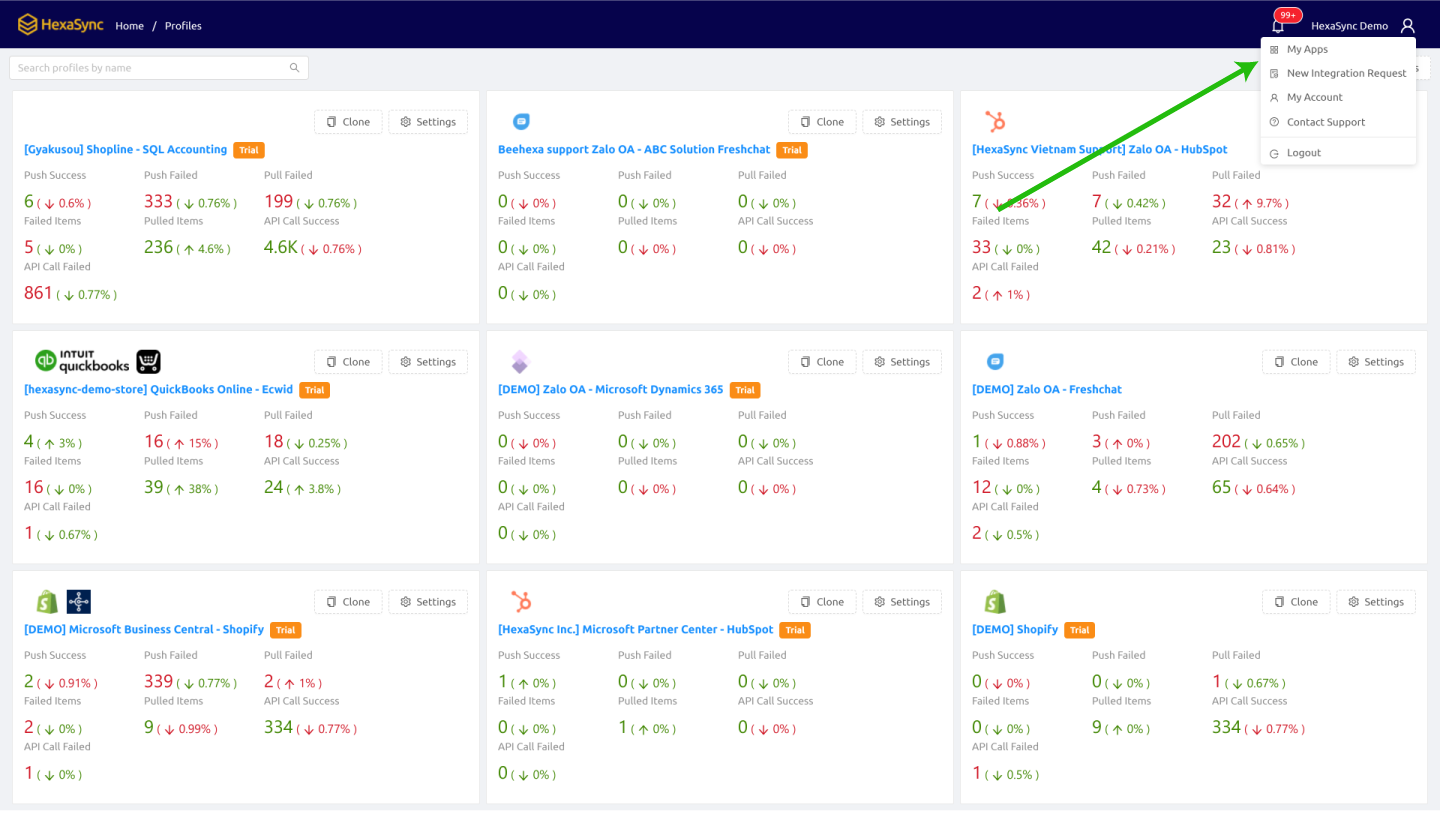
- First, log in to your HexaSync account at app.hexasync.com
- Navigate to the My Apps section to access the Apps Management Page.
- Click on Add App
Step 2: Search for the Zalo OA App
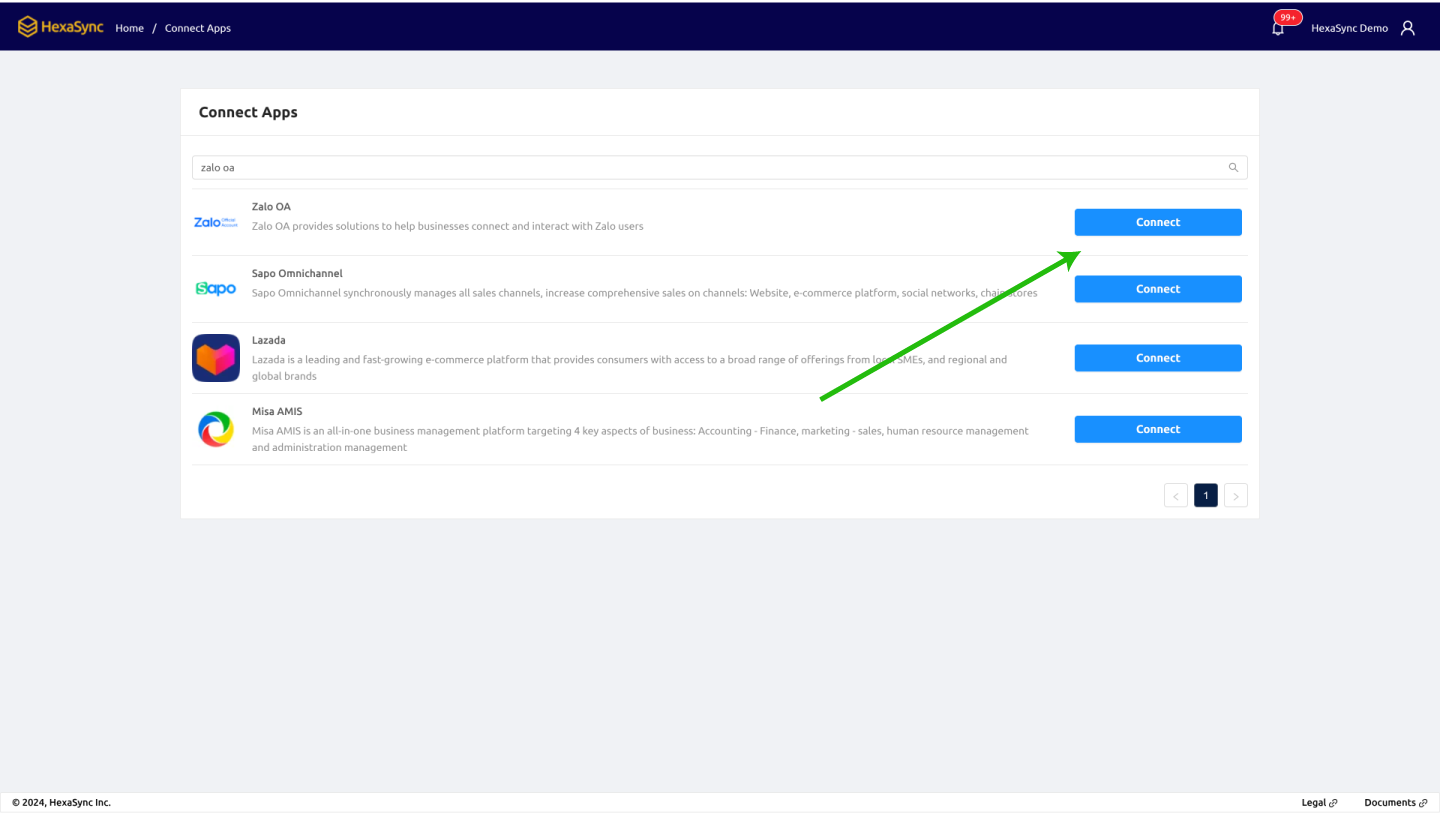
- In the search bar, type Zalo OA.
- When the Zalo OA app appears, click Connect
Step 3: Select Your Zalo OA account
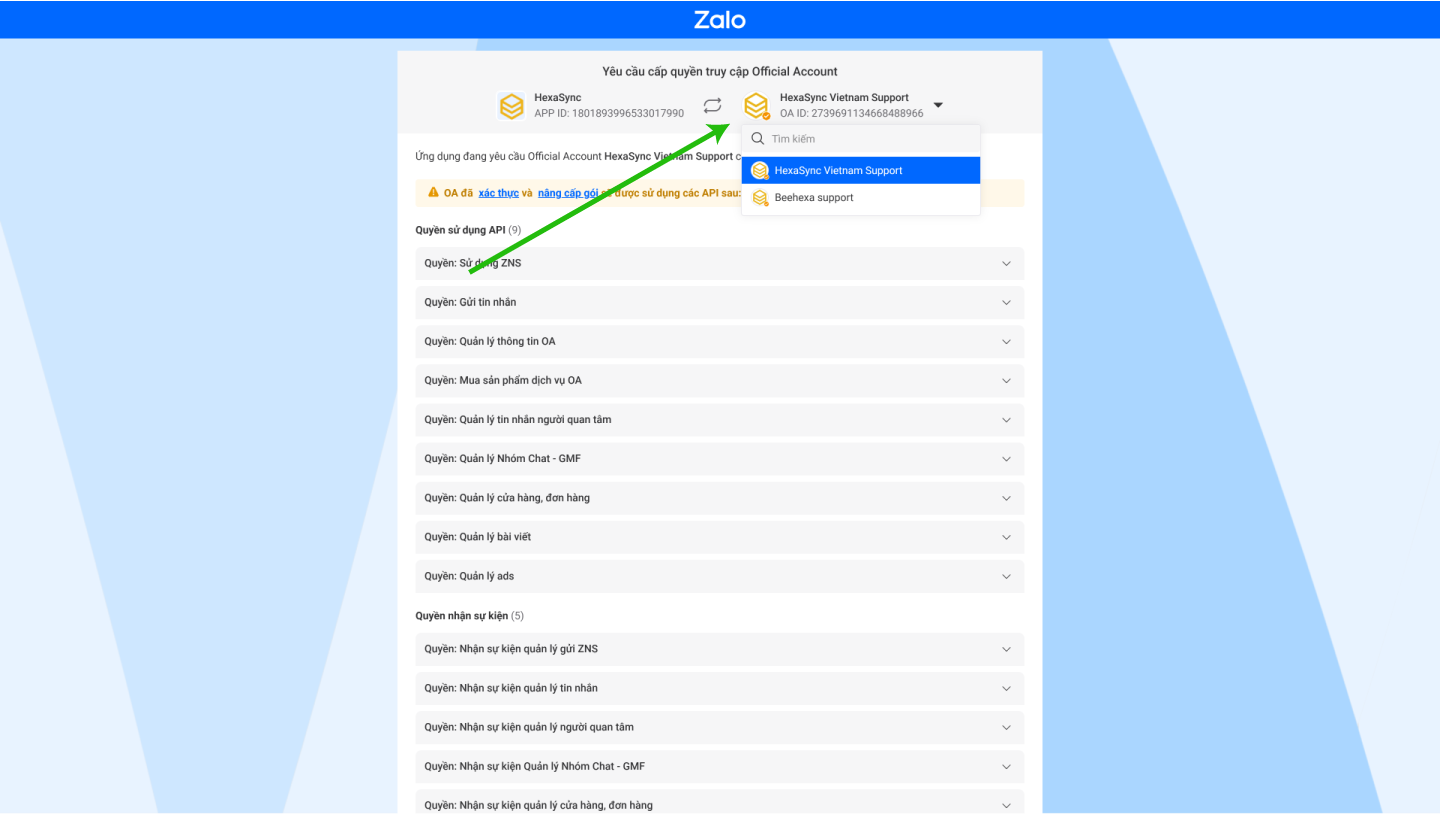
- Choose the Zalo OA account you want to connect to HexaSync.
Step 4: Authorize HexaSync
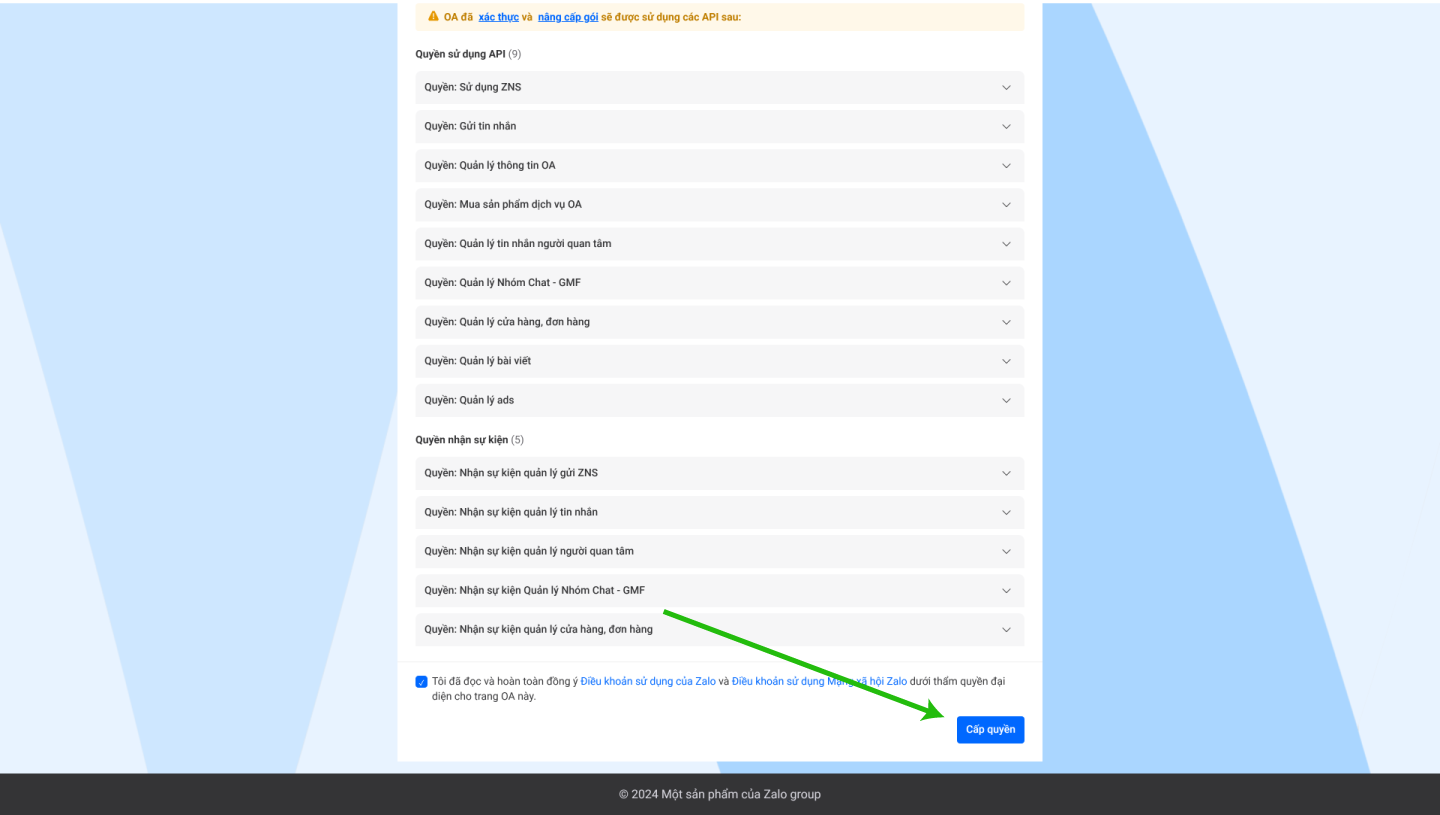
- After selecting, check the box for “I agree”
- Click Authorize to grant permission for the connection
Step 5: Finalize the Connection
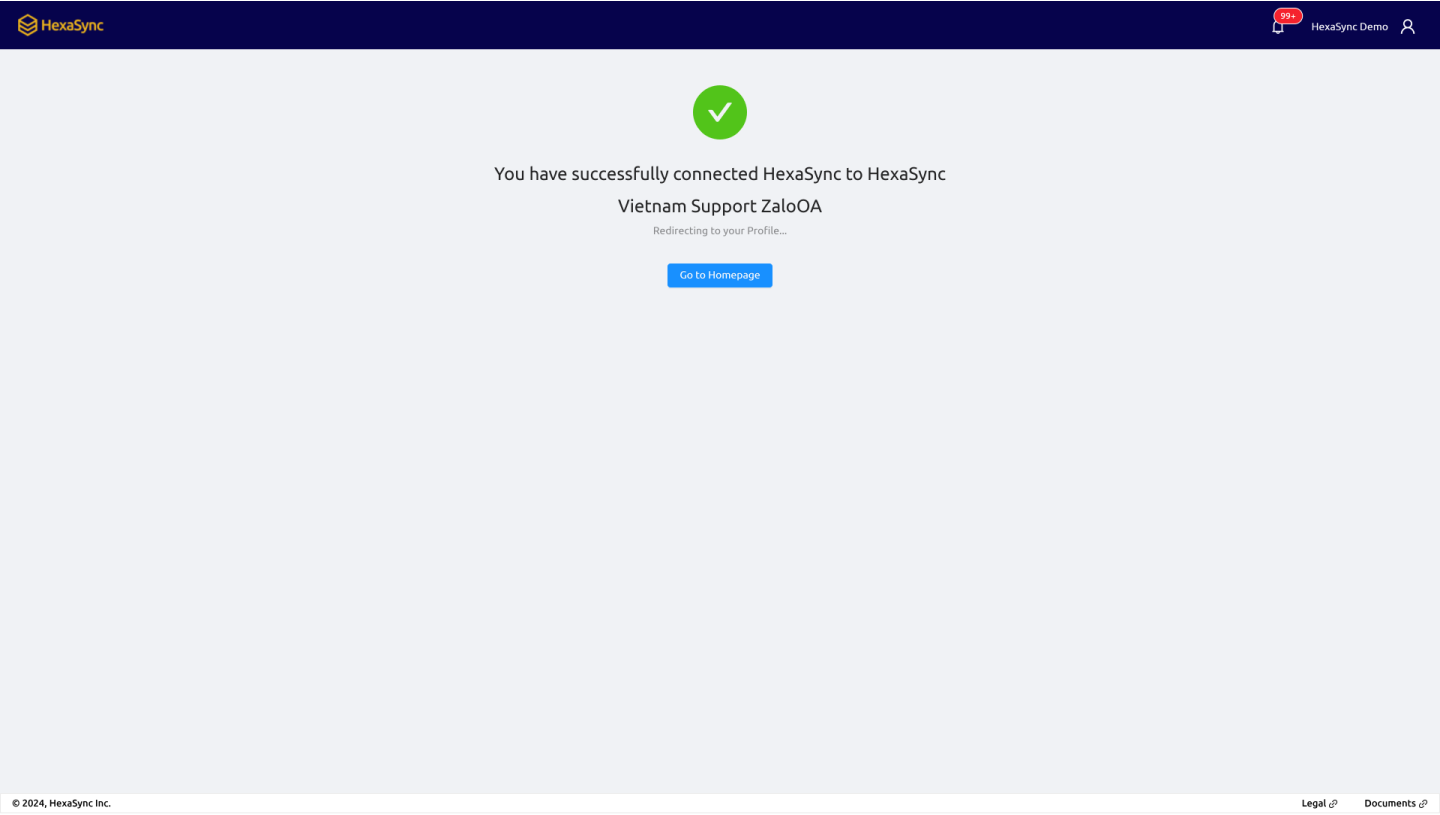
Once everything is confirmed, a notification screen will appear, indicating that you have successfully connected your Zalo OA account with HexaSync